Custom Provisioning Certificate
For production deployments, we highly recommend purchasing a 3rd party provisioning certificate. See all available vendors here.
Warning - Custom Provisioning Certificates in Production Deployments
The hash of custom provisioning certificates must be manually added to all devices that will be configured into ACM. This can be done through MEBx or USB Configuration. Both options require manual, hands-on configuration of each AMT device. Adding the hash to AMT's trusted list is a mandatory requirement for the device to successfully activate.
However, some developers opt to use a custom provisioning certificate for testing and validation purposes.
The steps below outline how to generate a custom certificate based on the requirements within the Intel® AMT SDK.
Note - Unprovisioning will Delete Custom Hashes
When a device is unprovisioned, AMT will delete and remove all hashes inserted. If you want to then activate the device again, you will have to reinsert the certificate hash again.
Generate Custom Provisioning Certificate
These steps create a certificate for a domain example.com and walk through how to successfully activate a device using the example.com DNS suffix.
What You'll Need
Software
Configuration Files
First, we need to prepare two files:
- cert.conf - Certificate configuration file. It is used to define the specific settings for the certificate.
- csr.conf - Certificate signing request configuration file.
Create cert.conf
-
Create a new file named
cert.conf. -
Copy and paste the below example into the file.
Do not remove the OID 2.16.840.1.113741.1.2.3 from the extendedKeyUsage. This is an AMT requirement.
Optionally, update the [alt_names] section with your own server DNS information.
cert.confbasicConstraints = CA:FALSE subjectKeyIdentifier = hash authorityKeyIdentifier = keyid,issuer:always keyUsage = digitalSignature, keyEncipherment extendedKeyUsage = serverAuth, 2.16.840.1.113741.1.2.3 subjectAltName = @alt_names [alt_names] DNS.1 = test.example.com DNS.2 = example.com IP.1 = 192.168.1.1 -
Save and close.
Create csr.conf
-
Create a new file named
csr.conf. -
Copy and paste the below example into the file.
Optionally, update the [dn] section and CN field with your own server FQDN and information.
csr.conf[ req ] default_bits = 2048 prompt = no default_md = sha256 distinguished_name = dn [ dn ] C = US ST = Arizona L = Chandler O = Organization OU = Department CN = test.example.com -
Save and close.
Create the Certificate and Hash
-
Open a terminal and verify OpenSSL is installed.
openssl version -
Create a self-signed CA root certificate file named
rootCA.crtwith a key file namedrootCA.key.openssl req -x509 -sha256 -days 3560 -nodes -newkey rsa:2048 -subj "//SKIP=skip/CN=CA Custom Root Certificate/C=US/ST=Arizona/L=Chandler" -keyout rootCA.key -out rootCA.crt -
Generate a RSA private key named server.key.
openssl genrsa -out server.key 2048 -
Generate a Certificate Signing Request using the private key and
cert.conffile.openssl req -new -key server.key -out server.csr -config csr.conf -
Sign the Certificate Signing Request with the CA certificate and
cert.conffile.openssl x509 -req -in server.csr -CA rootCA.crt -CAkey rootCA.key -CAcreateserial -out server.crt -days 3650 -sha256 -extfile cert.conf -
Create a
.pfxfile using the private key, server certificate, and CA root certificate. It will prompt to create a password. This password will be used when creating a Domain profile.openssl pkcs12 -export -out vprodemo_custom.pfx -inkey server.key -in server.crt -certfile rootCA.crt -
Get the SHA1 hash of the root certificate.
openssl x509 -noout -fingerprint -sha1 -inform pem -in rootCA.crtSuccess - SHA1 Output
SHA1 Fingerprint=51:45:E3:A4:AE:66:88:E0:AF:85:EC:EB:06:74:6B:8D:C3:07:C1:9D
Upload Provisioning Certificate
Create Domain Profile
-
Open the Sample Web UI and Login.
-
Create a domain profile. Upload the
.pfxfile and enter the password set for it. See Create a Domain Profile for more details.
Insert the Hash using MEBx
Warning - Adding Hash for AMT 16 or Newer
These steps may not be exact or available within MEBx on AMT 16 or newer devices due to OEM restrictions. USB Configuration may be required.
-
Switch to the AMT device.
-
Restart the device. While the device is booting up, press Ctrl+P to reach the MEBX login screen.
Note - Other Keybinds to Enter MEBx
The keystroke combination Ctrl+P typically invokes the BIOS to display the MEBX login screen. If this does not work, check the manufacturer's instructions or try function keys (e.g., F2, F12).
-
Enter the MEBx password.
Note - Default MEBx Password for First Time Use
If it is the first time entering MEBX and the device has not been provisioned previously, the default password is
admin. Create a new password when prompted. -
Select Intel(r) AMT Configuration.
-
Verify that the device is in pre-provisioning mode. If not, perform a full unprovision under Unconfigure Network Access.
-
Select Remote Setup and Configuration.
-
Select TLS PKI.
-
Set the PKI DNS suffix to
example.com.Or, if using a different DNS suffix, set it to that instead. See DNS Suffix for more details.
-
Select Manage Hashes.
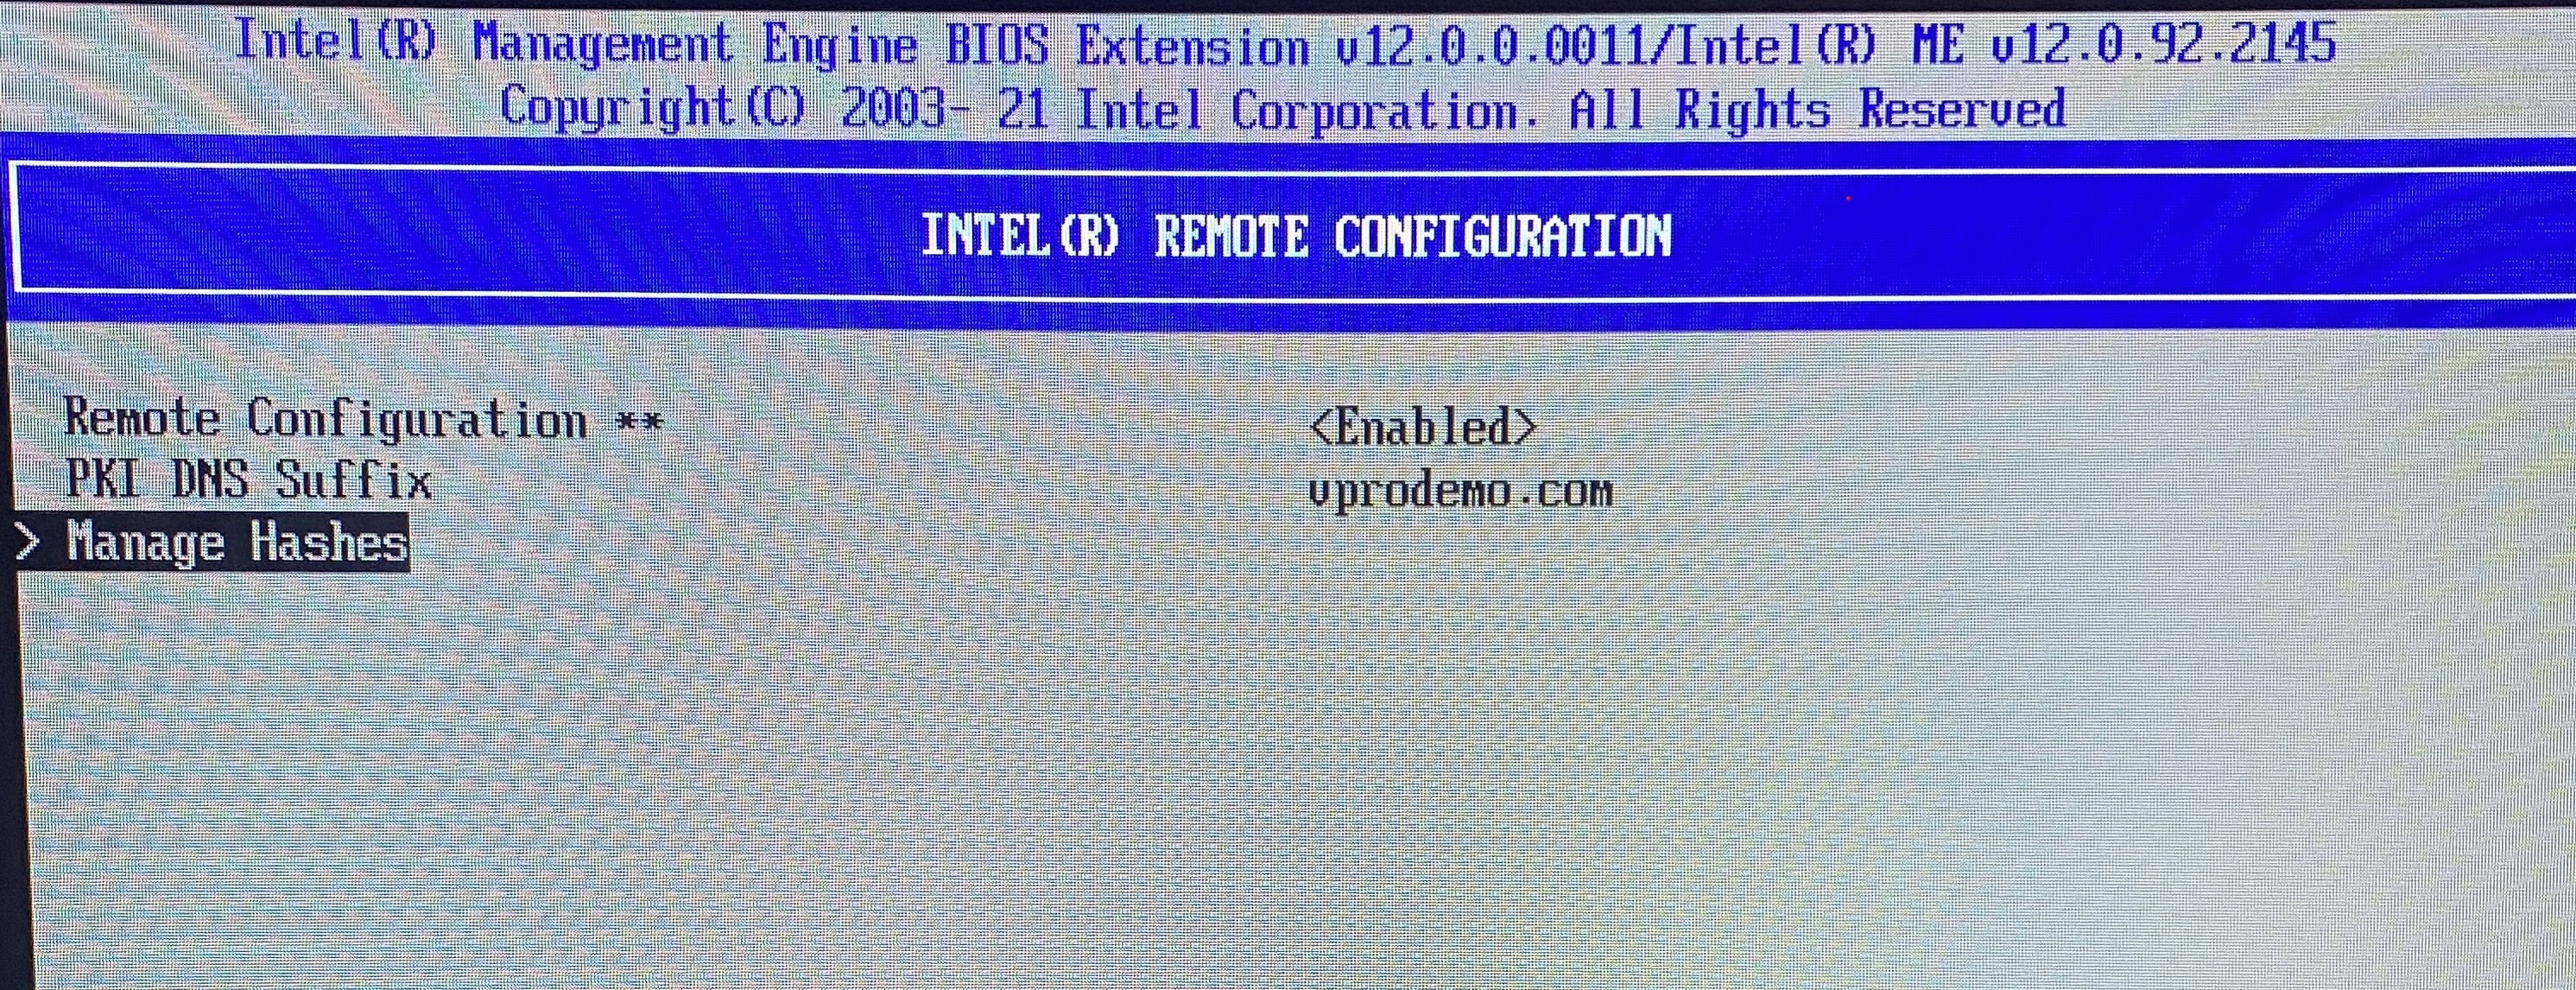
Figure 1: Manage Hashes -
Press the
Insertkey. -
Provide a name for the new hash and press Enter.
-
Insert the new SHA1 hash using the fingerprint obtained from Step 7 in Create the Certificate and Hash. The hash must be formatted as shown in example.
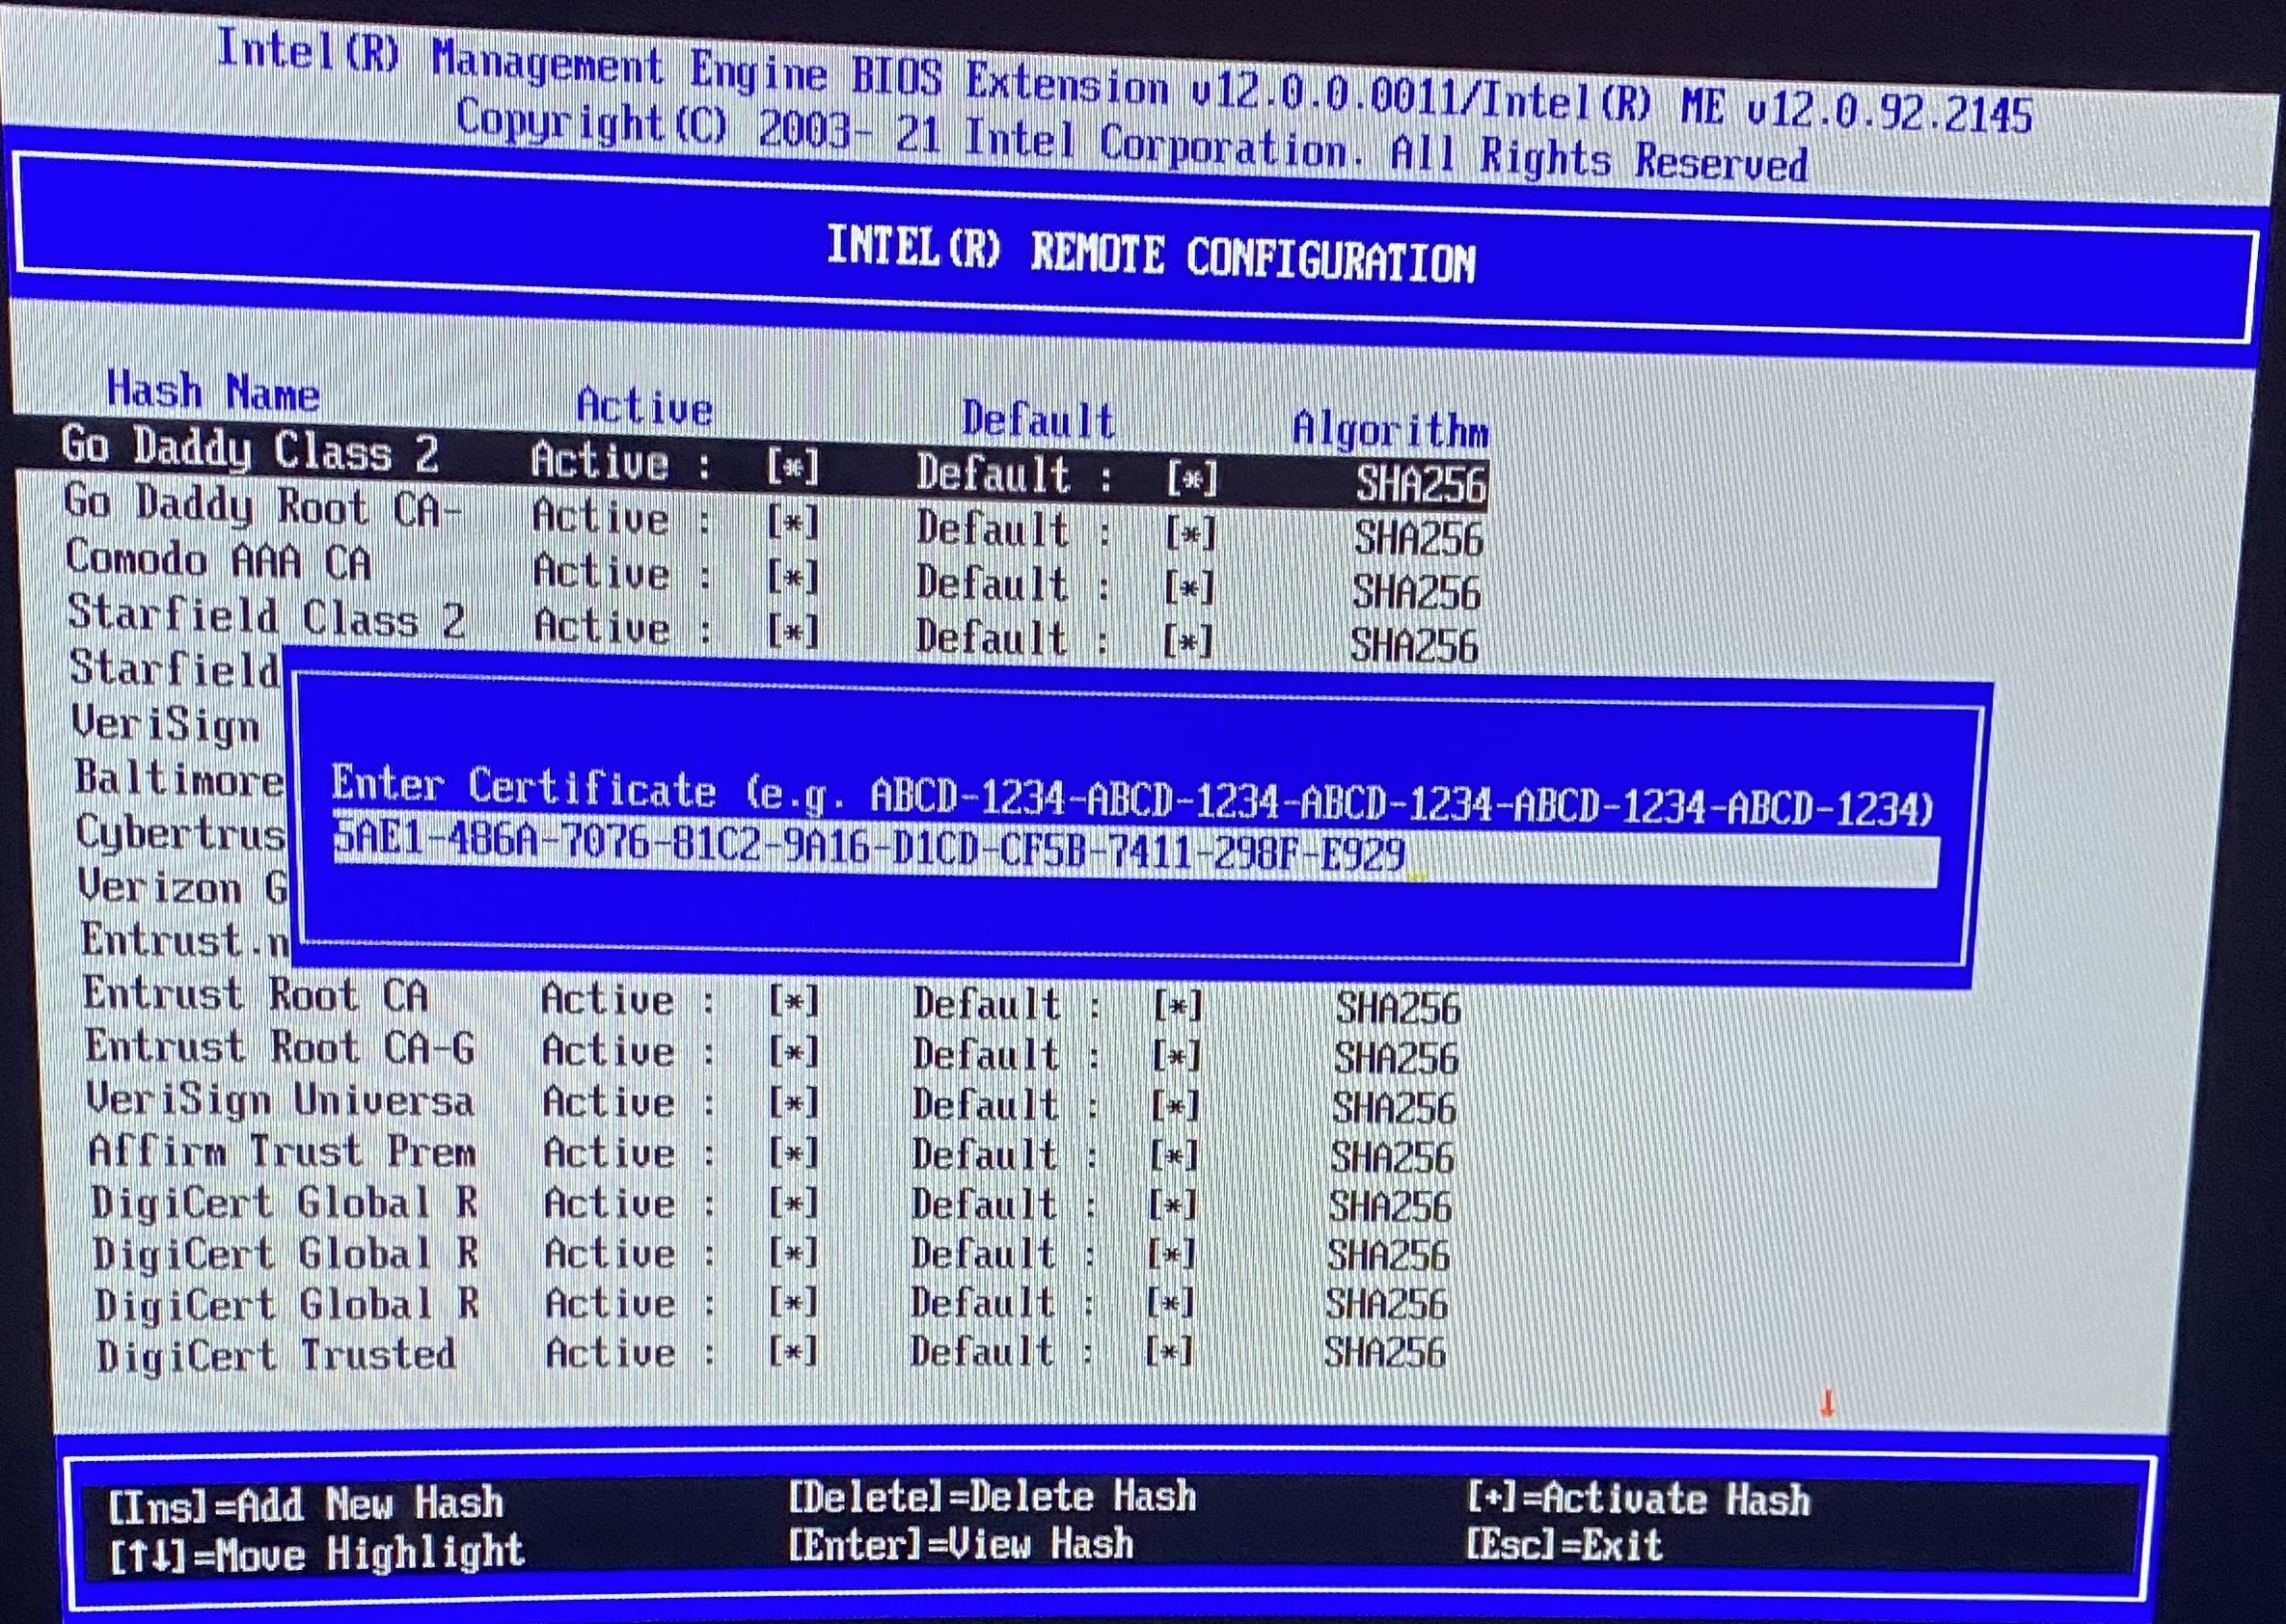
Figure 2: Hash Input -
Press the
Ykey to set the hash as active. -
Press the
esckey repeatedly to exit MEBx and reboot the device.
Verify the Hash
-
After the device reboots, open Terminal or Command Prompt as Administrator.
-
Verify the certificate hash was inserted correctly.
The new hash should be listed.
sudo ./rpc amtinfo -cert.\rpc amtinfo -certSuccess - Hash Inserted Correctly
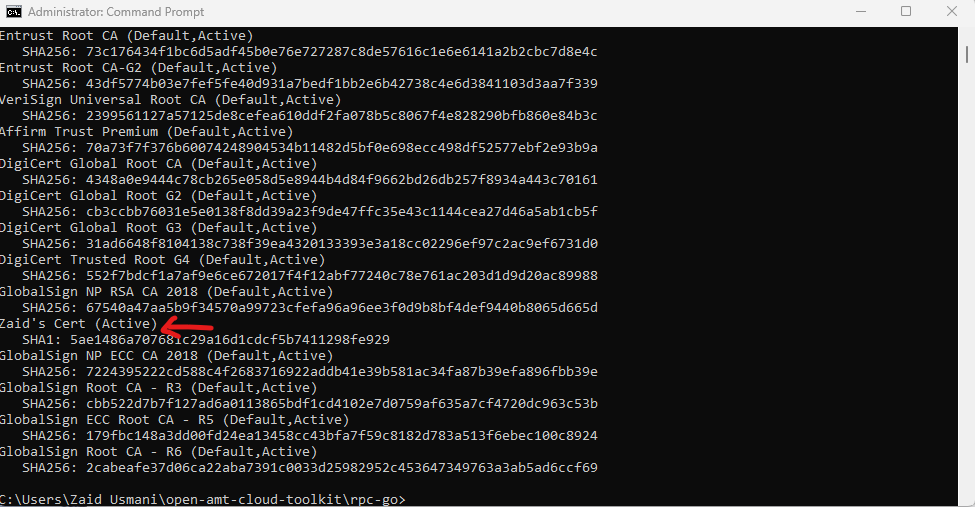
Figure 4: Hash Output -
Activate the AMT device with an ACM Profile. See Create a Profile with ACM and Build & Run RPC for more details.
Troubleshoot - Error During Activation
The following error may occur during the first attempt at activation.
time="2023-08-17T11:38:57-07:00" level=trace msg="HTTP/1.1 200 OK\r\nDate: Thu, 17 Aug 2023 18:38:57 GMT\r\nServer: Intel(R) Active Management Technology 15.0.35.2039\r\nX-Frame-Options: DENY\r\nContent-Type: application/soap+xml; charset=UTF-8\r\nTransfer-Encoding: chunked\r\n\r\n043E\r\n<?xml version=\"1.0\" encoding=\"UTF-8\"?><a:Envelope xmlns:a=\"http://www.w3.org/2003/05/soap-envelope\" xmlns:b=\"http://schemas.xmlsoap.org/ws/2004/08/addressing\" xmlns:c=\"http://schemas.dmtf.org/wbem/wsman/1/wsman.xsd\" xmlns:d=\"http://schemas.xmlsoap.org/ws/2005/02/trust\" xmlns:e=\"http://docs.oasis-open.org/wss/2004/01/oasis-200401-wss-wssecurity-secext-1.0.xsd\" xmlns:f=\"http://schemas.dmtf.org/wbem/wsman/1/cimbinding.xsd\" xmlns:g=\"http://intel.com/wbem/wscim/1/ips-schema/1/IPS_HostBasedSetupService\" xmlns:xsi=\"http://www.w3.org/2001/XMLSchema-instance\"><a:Header><b:To>http://schemas.xmlsoap.org/ws/2004/08/addressing/role/anonymous</b:To><b:RelatesTo>3</b:RelatesTo><b:Action a:mustUnderstand=\"true\">http://intel.com/wbem/wscim/1/ips-schema/1/IPS_HostBasedSetupService/AdminSetupResponse</b:Acti" time="2023-08-17T11:38:57-07:00" level=debug msg="sending message to RPS" time="2023-08-17T11:38:57-07:00" level=debug msg="closing connection to lms" time="2023-08-17T11:38:57-07:00" level=debug msg="received messages from RPS" time="2023-08-17T11:38:57-07:00" level=error msg="Unknown error has occured" time="2023-08-17T11:38:57-07:00" level=debug msg="closing connection to lms"-
If this error occurs, verify the device was activated successfully.
rpc amtinfo -
If the device shows it was activated into admin control mode, rerun the activate command to successfully finish AMT configuration.
-
-
During device unprovisioning, AMT will delete any inserted hashes and will have to be manually reinserted.