Add MPS UI Toolkit Controls to a WebUI
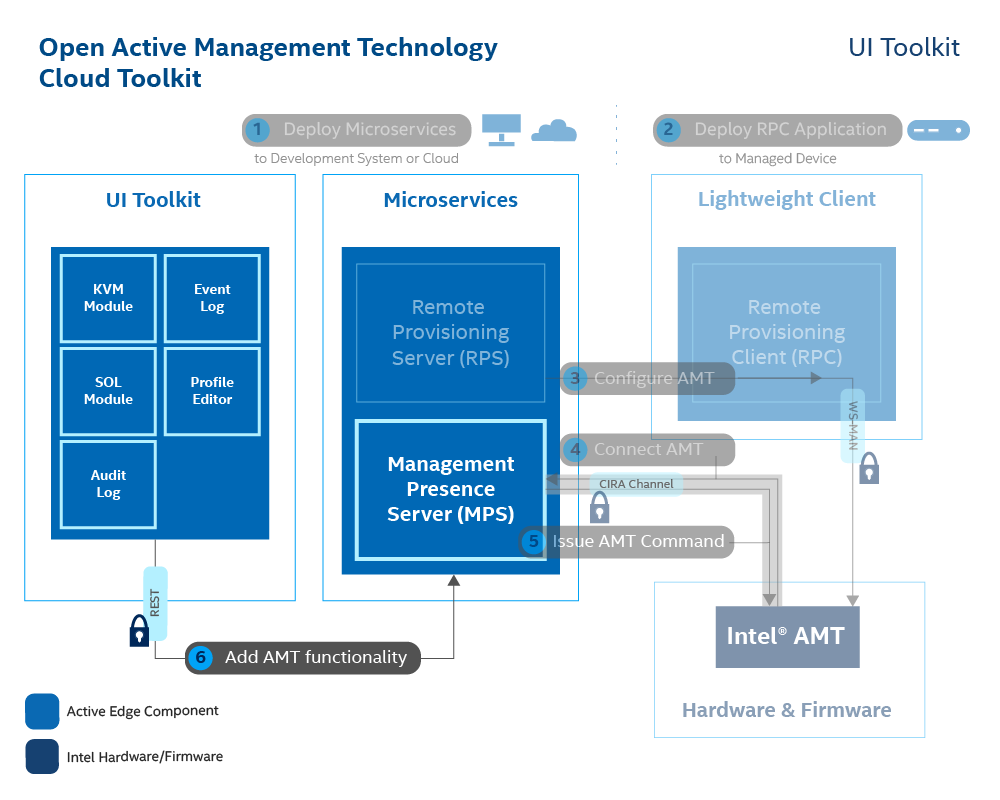
The UI Toolkit allows developers to add manageability features to a console with prebuilt React components. The code snippets simplify the task of adding complex manageability UI controls, such as the Keyboard, Video, Mouse (KVM). A sample web application, based on React.js, is provided for test and development.
The tutorial outlines how to add various controls to the sample React web application provided. Developers can use the sample code below as a springboard for developing their own consoles.
What You'll Need
Hardware
At minimum, to install and utilize the Open AMT Cloud Toolkit microservices, a network configuration must include:
- A development system with Windows 10 or Ubuntu 18.04 or newer
- At least one Intel® vPro device
Software
- MPS, the Management Presence Server
- RPS, the Remote Provisioning Server
- Intel® vPro device, configured and connected to MPS
Note
Instructions on how to set up the MPS and RPS servers to connect a vPro device can be followed in the Local or Local Docker Build and Deploy Guides.
- The development system requires the following software:
- Chrome* Browser
- git
- Visual Studio Code or any other IDE
- Node.js* LTS 12.x.x or newer
What You'll Do
Follow the steps in these sections sequentially:
- Create a new React app
- Add UI controls to the React app
Create a New React App
The React app can be created in any preferred development directory. The MPS can continue to run while creating and running the app.
-
In a Command Prompt or Terminal, go to your preferred development directory.
-
Run the following commands to create sample React app named
my-app.
npx create-react-app my-app && cd my-app
Add UI Toolkit
-
Run the following command to add the UI Toolkit and install the required dependencies:
npm uninstall react react-dom --save npm install git+https://github.com/open-amt-cloud-toolkit/ui-toolkit.git#v1.1.0 react@16.13.1 react-dom@16.13.1 --save -
Run the following commands to start the web UI locally:
npm start
By default, React apps run on port 3000. If port 3000 is already used by the MPS server or any other application, you'll be prompted to use another port. If this happens, enter 'Y'.
Success
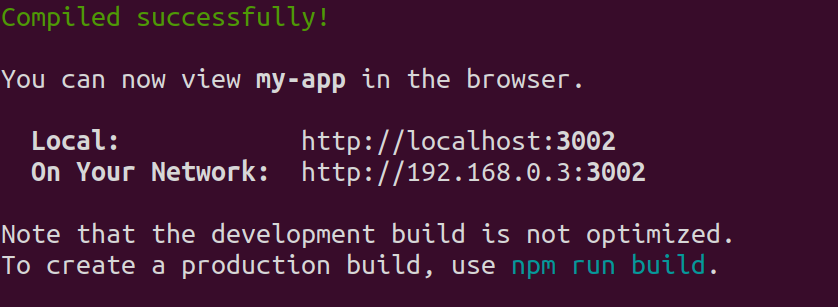
Figure 2: React reports successful deployment.
Note
It is possible to see the below error after running npm start. This is okay and will be automatically resolved in the next section.
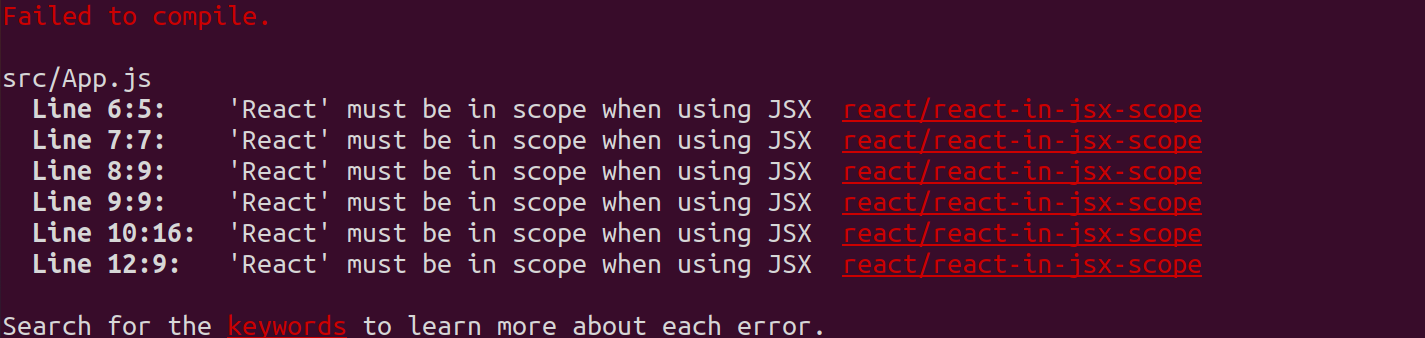
Figure 3: React reports failed compilation.
Important
By default, React launches in your machine's default browser. However for best experience, navigate to the page using a Chromium based web browser. When you make changes, you do not need to stop the application and restart. It will update and refresh automatically as you make code changes.
Add a Sample Control
The following sections outline how to add controls. To use the code snippets provided, replace what is in the App.js file with the provided code snippet.
Refresh the web browser after adding a control if it does not update automatically after a few seconds.
Add Keyboard, Video, Mouse (KVM) Redirection
The code snippet below adds KVM control to the React application.
-
Open
./my-app/src/App.jsin a text editor or IDE of choice, such as Visual Studio Code or Notepad. -
Delete the current code and replace with the code snippet below.
-
Change the following values:
Field Value deviceIdReplace the example deviceId value with the GUID of the Intel AMT device activated and connected to your MPS server. Information on obtaining a GUID can be found here. mpsServerReplace the localhost with the IP Address of your Development Device or MPS Server. Default MPS Server port is 3000. import React from "react"; import "./App.css"; import { KVM, MpsProvider } from "ui-toolkit"; import '../node_modules/ui-toolkit/i18n.ts'; function App() { const data = { mpsKey: '<MPS API key>' }; return ( <div className="App"> <MpsProvider data={data}> <KVM deviceId="038d0240-045c-05f4-7706-980700080009" //Replace with AMT Device GUID mpsServer="localhost:3000/relay" //Replace 'localhost' with Development System or MPS Server IP mouseDebounceTime="200" canvasHeight="100%" canvasWidth="100%"></KVM> </MpsProvider> </div> ); } export default App; -
Save and close the file.
-
If the React app is still open in the browser and hasn't updated, refresh the page. If not already open, open Chrome and navigate to the given URLs from your successful output. By default it is
https://localhost:3001if MPS is running on Port 3000 already.
You are now able to remotely control your Intel AMT device. Other controls such as device audit logs or profiles for RPS have example code below to test with.
You will see the errors in the following scenario's:
- compilation errors if ui-toolkit has not downloaded and installed to your react app.
- MPS/RPS server not running, appropriate controls fail to work.
- MPS server running and device not connected.
- If your browser is IE / Edge, there might be some compatibility issues.
Next Steps
Try Other Controls
Try out other React controls such as Serial Over LAN or Audit Logs here
Customize and Create Bundles
Try out creating and customizing React bundles for things such as Serial Over LAN or KVM here
License Note
If you are distributing the FortAwesome Icons, please provide attribution to the source per the CC-by 4.0 license obligations.