Create Profile with TLS
During the activation process with the Remote Provisioning Client (RPC), profiles provide configuration information to the firmware on platforms featuring Intel® AMT.
In Profiles, the Open AMT Cloud Toolkit supports Client Initiated Remote Access (CIRA) connections, which use Transport Layer Security (TLS). The toolkit also supports TLS without CIRA. TLS connections encrypt Intel® AMT network traffic, increasing data security and privacy.
Important
- TLS works with both ACM And CCM.
- Because CIRA connections already use TLS, the option to use both in a profile is not available, as it would double the amount of encryption/decryption and potentially impact performance.
To create a profile with TLS Config:
-
Select the Profiles tab from the menu on the left.
-
Under the Profiles tab, click + Add New in the top-right corner to create a profile.
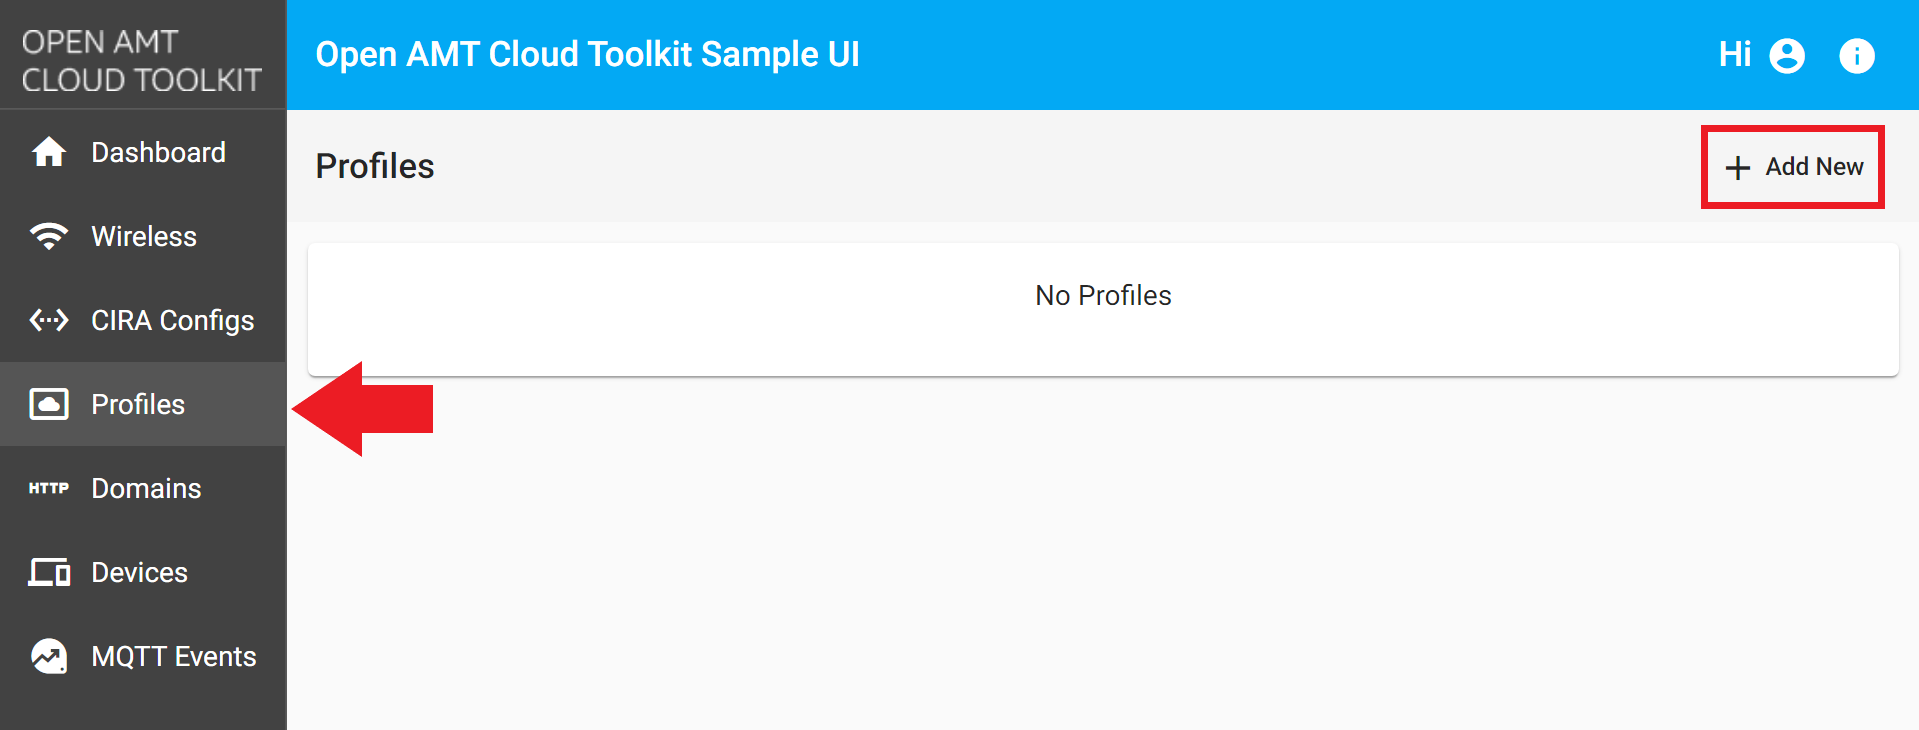
Figure 1: Create a new profile -
Specify a Profile Name of your choice.
-
Under Activation Mode from the dropdown menu.
-
Provide or generate a strong AMT Password. AMT will verify this password when receiving a command from a MPS server. This password is also required for device deactivation.
Tip
The two buttons next to the password input are for toggling visibility and generating a new random password. Please note that if the Vault database is lost or corrupted, all credentials that aren't also stored somewhere else will be lost. There will be no way to login. The administrator will have to clear the CMOS battery on the managed devices!
-
The MEBX Password field is disabled, as the password for Intel® Manageability Engine BIOS Extensions (Intel® MEBX) cannot be set when activating in CCM due to the lower level of trust when compared to ACM.
-
Leave DHCP as the default for Network Configuration.
-
Optionally, add Tags to help in organizing and querying devices as your list of managed devices grow.
-
Select Connection Configuration to TLS (Enterprise)
-
Under TLS (Enterprise), select the TLS Mode from the dropdown menu.
The toolkit offers four configuration modes to support various usage models:
CONFIGURATION MODE DESCRIPTION Server Authentication Only The client authenticates the server request and accepts only those servers with a digital certificate. Server and Non-TLS Authentication Used primarily for testing. The client authenticates the server request and accepts legitimate digital certificates from TLS-enabled servers. However, if the server is not TLS-enabled, the client defaults to a CIRA connection. Mutual TLS Authentication Only Both client and server must have certs. The client cert is signed by the server cert. Mutual and Non-TLS Authentication Used primarily for testing. Both client and server certs are expected. The client authenticates the server request and accepts legitimate digital certificates from TLS-enabled servers. However, if the server is not TLS-enabled, the client defaults to a CIRA connection. -
This express setup assumes the managed device (i.e. AMT device) is on a wired connection for quickest setup. To learn more about a Wireless Setup, see the Wireless Activation Tutorial.
-
Click Save.
Example profile with TLS Config
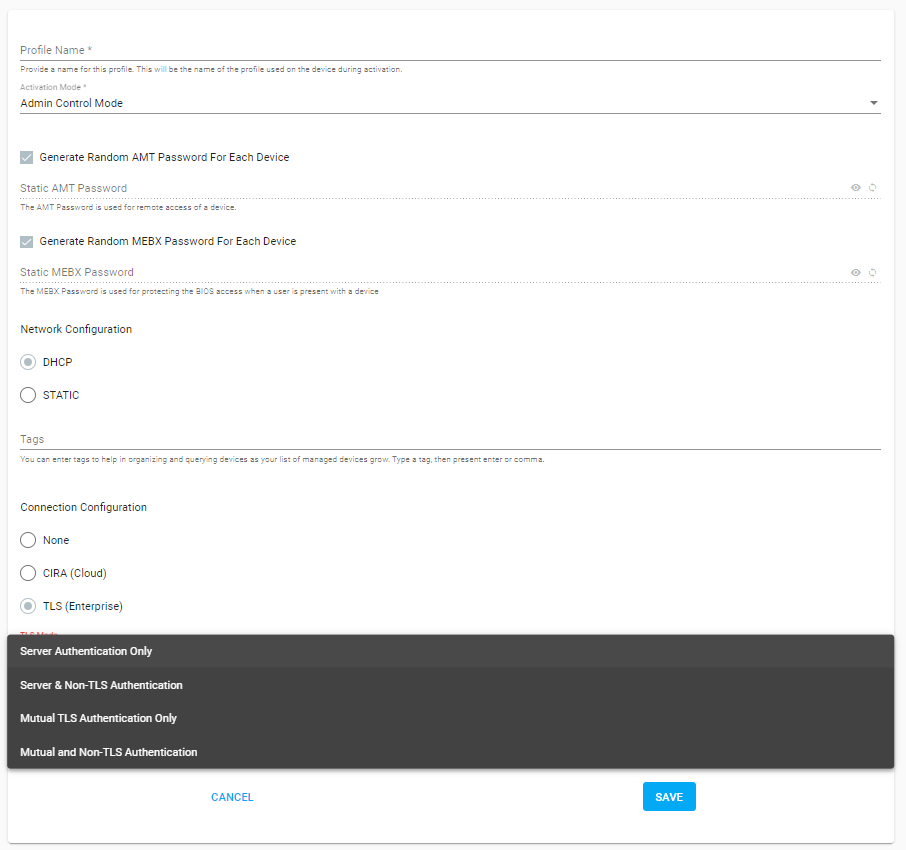
Figure 2: Example profile with TLS Config -
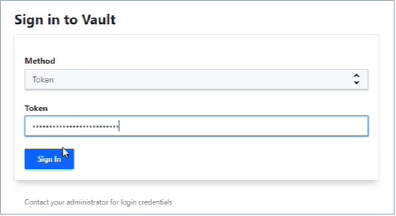
To confirm the digital certificates generated for the profile, open a browser and navigate to the Vault service at https://localhost:8200 for a local Docker deployment or [Cloud-FQDN]:8200 (Ex: openamt.eastus.cloudapp.azure.com:8200) for a cloud deployment.
-
Sign in to Vault with the
VAULT_TOKENstored in the .env file or Root Token (Ex: s.QnhrbjXyH08UD7y6PHBDmjq9) generated when unsealing and initializing Vault in your cloud deployment.
-
Navigate to the path
secret/TLS/[profile name]for a local dev mode Vault deployment. Orkv/TLS/[profile name]for a cloud deployment.Example of Certificate Storage
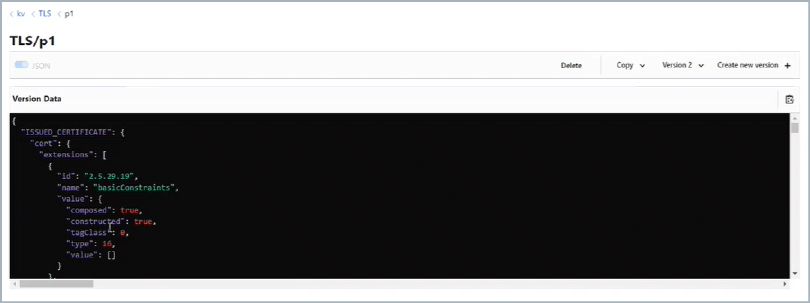
Figure 4: Digital Certificate